Any home shop has the problem of how to sharpen drill bits or how to grind lathe tools with precision. The old time machinists tell you to do it all by hand. My take on that is that spending the time to train the muscles in my hands to do a good job with such sharpening isn't ever going to happen. So I decided to once again build a setup that uses one side of a bench grinder to sharpen drills and the other to grind HSS tool bits to precise angles. This page tells how I built the custom table to do this, and goes into some detail on how I obtained a grinder and the sharpening tools, plus how I build tool stands.
Let's start with building the table. A tool stand is only as solid as its base. I really like using scrap truck brake drums for such bases. I've done it several times already and I know they are easy to get (and usually free!) and clean, and that in use they look good and actually aren't hard to move around in my shop even without casters. The first part of this page is going to be about truck brake drums.
When guys visit my shop they often ask me where they can get truck brake drums. The answer is from shops that do brake jobs on trucks! I live near Seattle, which has a substantial industrial base. I keep phone numbers for 3 or 4 commercial truck repair shops and when I need a brake drum or two, I just call them up and ask politely if I can get one (or two) scrap brake drums for a project. I stress that I'm not planning to scrap them for money, that these are for an actual project. I have had very good luck doing this, and they have never asked me for payment. Admittedly, this last time they were in a tall deep dumpster and I had to prevail upon one of the strong young men who worked there to lift them out for me. I did make a donation to their beer fund, and it was a win-win all around.
When I get home with my prize new acquisitions, I always am sobered by realizing that these are filthy, greasy, rusty, heavy lumps of cast steel, and that I have a lot of work to do. The first step is pressure washing. The next picture shows how they look after I'm done pressure washing. It knocks off most of the filth and some of the loose rust.
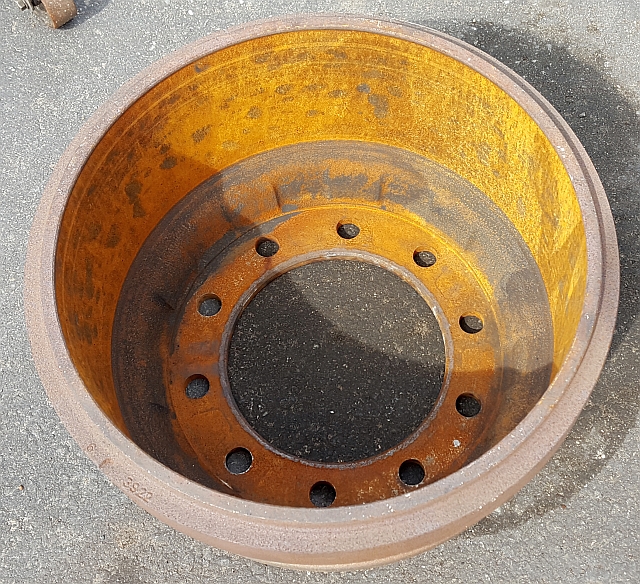
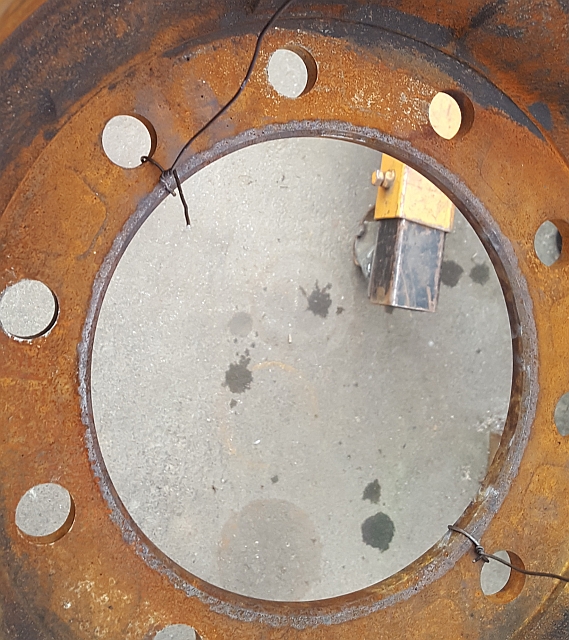
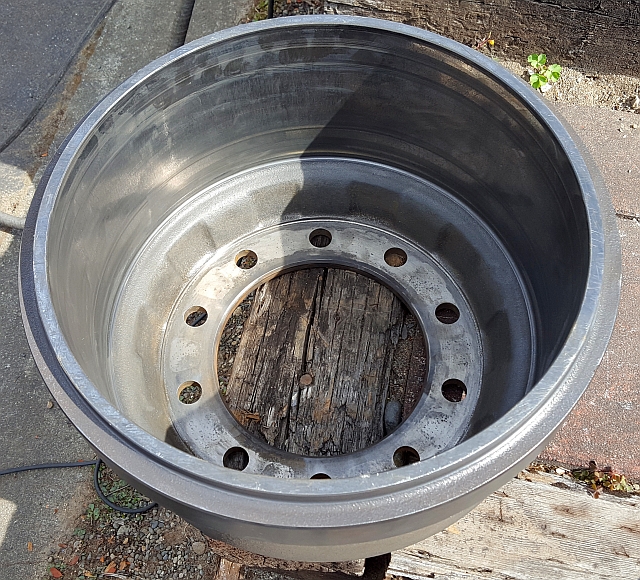
This is what the inside of one of the drums looked like after pressure washing but before derusting:
When I was younger, stronger and dumber, I would have just grabbed the angle grinder with cup wire wheel and knocked the rust off inside and out by brute force. Several hours of running a tool like that doesn't do my hands any good, plus it's backbreaking work. I try to work a bit smarter these days. I set up a bath for electrolytic derusting. The topic of electrolytic derusting (EDR) has been extensively written up in many places, so I'm not going to talk about the process itself, just how I actually clean truck brake drums using it.
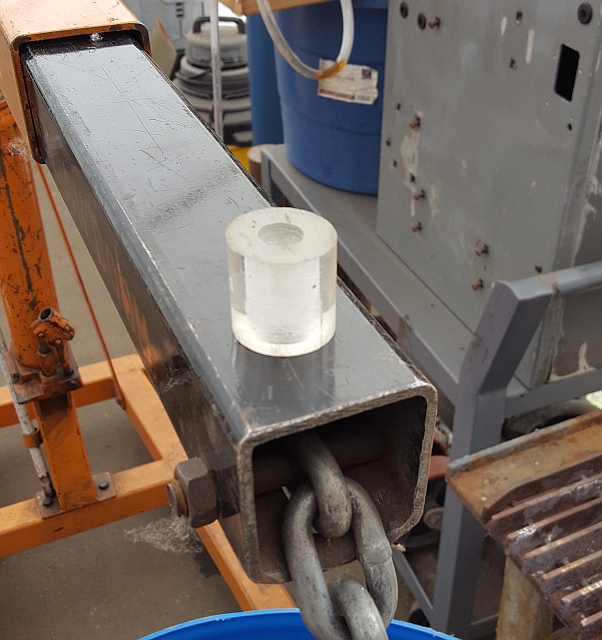
I start with a blue plastic 55 gallon drum. This is another common industrial castoff that can be gotten cheap or free. I put a wavy straight blade on my cordless jigsaw and cut the top off. I'm left with a durable, capacious and watertight vessel that is ideally suited for this task. I think the process works better if the part isn't sitting on the bottom of the tub, so I use 3 standoffs. I have a bunch of lucite round pieces that I made a long time ago so I put 3 of them around the bottom of the tub for the drum to sit on. This is what one of those standoffs looks like:
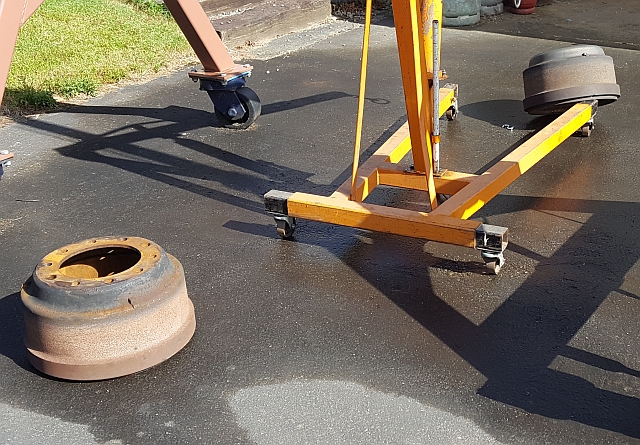
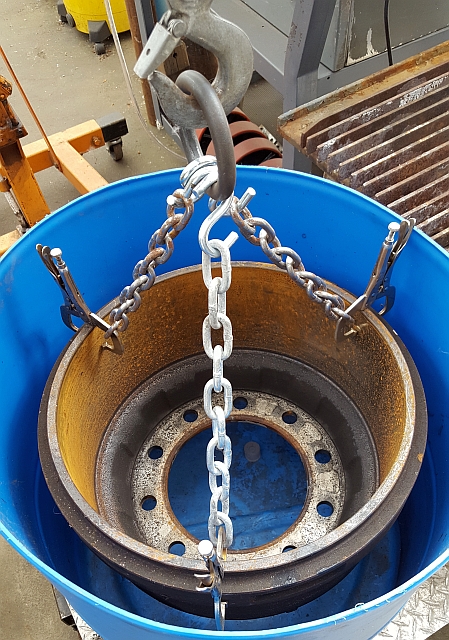
Of course, anything is stable if supported by 3 points, so I don't worry about precisely locating the standoffs on the bottom of the bath. I do worry about my back, though. These drums are heavy for an old guy like me (62 as I write this). So I use my old trusty engine hoist to lower a drum down into the bath. It looks like this:
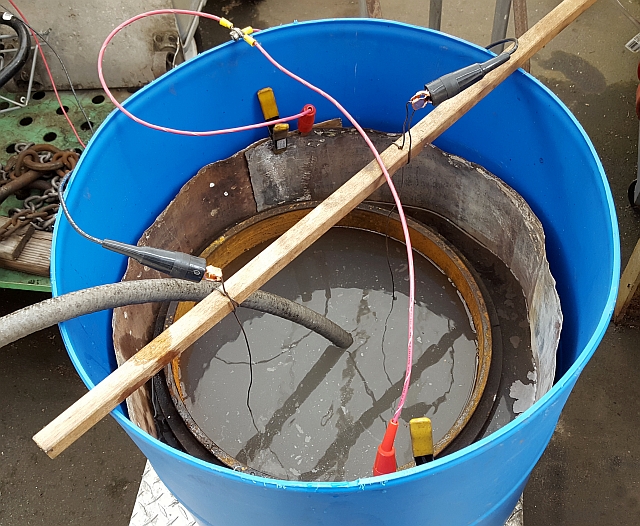
These brake drums are about 10-3/4" tall. The standoffs are 1-1/4" long, so the water in the bath just covers the drum when it's 12" deep. I buy metallic lead flashing from a roofing supply house. Those rolls are 16" wide, so even if I fill the bath so the drum is completely submerged by an inch, the lead electrodes stick up from the bath. I have a couple of pieces of lead sheet 16x36", and I just wind them around the outside edge of the bath and clamp them together and clip on the positive electrodes for a solid electrical connection. I don't like to submerge my alligator clips in the EDR bath, so these days I generally run 16 gauge steel tie wire up from the part to above the bath, and connect those to the negative electrodes with alligator clips. This shows a rusty drum with those wires connected:
This is what the bath looks like during filling, partly full:
If you decide to use lead sheet the way I do to do EDR, be aware that after use you should remove the electrodes from the bath promptly and wash them and let them dry. The washing soda bath will otherwise eat away the lead until eventually after a couple of years it will crumble away to nothing.
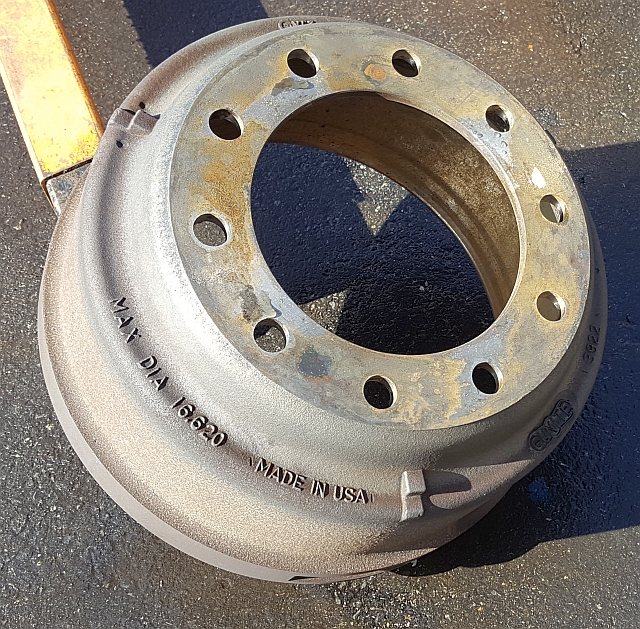
My DC power supply is fitted with red and black 10 gauge wires. Each is split into 2 for ease in wiring in 2 places. If you look closely at the image above you can see how the steel tie wire is run up and wrapped to a wooden rod suspended above the bath. I double it up, making a good stiff solid place to attach the black alligator clips. My power supply can run up to 30 amps DC at up to 30 volts DC. For this job, I ran about 29 amps of current for about 12 hours. Immediately after removal from the derusting bath, I hit the drum again with the pressure washer. This knocks off a lot of the black stuff. This process doesn't do a perfect job, but what's left behind is loosely attached and much easier to knock off with an angle grinder. If I'd used the grinder to clean the drums without the bath I would have had to press hard and go very slowly, going over the same areas several times. After going through the EDR bath I can clean the drum to shiny with just a few wipes of the grinder. Here is what a drum looks like as it comes from the bath. Note that the rusty flange (with the ten holes) was aimed down and not within line of sight of the electrode, so it wasn't cleaned as well. The pictures after that show what it looks like after a quick whizz with the angle grinder:
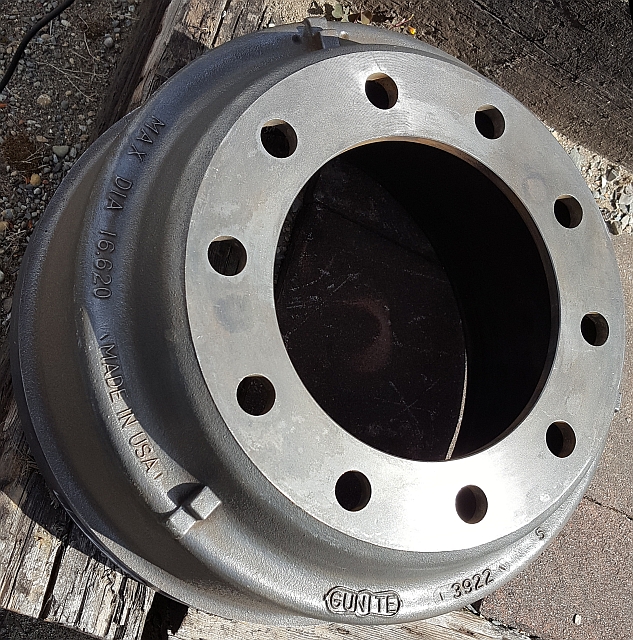
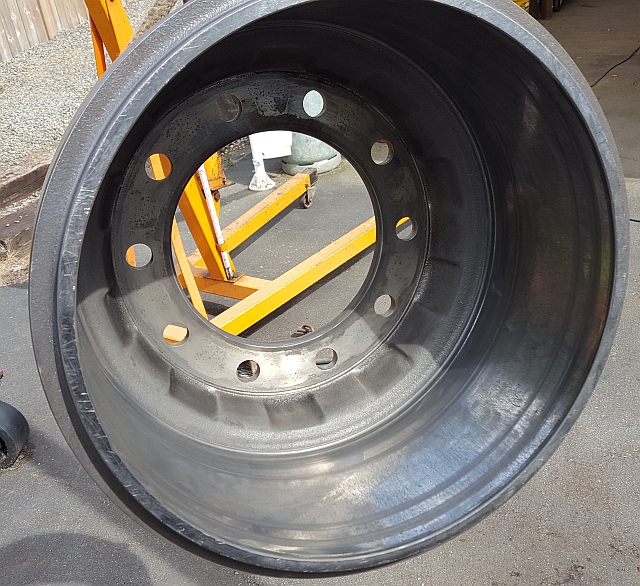
Now that drum I can work with! It might not look quite brand new, but it's plenty clean enough for my purposes. With the base of my sharpening table all squared away, it was time to prepare the lower plate that bolts to the brake drum. These drums use the larger Budd 10-bolt bolt pattern, a 10 on 11-1/4" bolt circle. I don't bother using ten bolts, seems like overkill. So I skip every other one and wind up with 5 bolt holes. From a prior project I had a piece of 1/2" plate cut into a 13" circle. I'd cut it out with a torch and a circle cutting attachment, so there was already a centerpunch in the middle of the plate. I used my beam trammels with one side set up with a silver pencil to draw the 5-5/8" radius circle. I did a trivial bit of shop math and came up with the length of the chordal distance between two hole centers being 6.613". So I set my beam trammels to that distance and marked off the holes easy as pie. I used an ironworker to punch the five 11/16" holes, and the lower plate was ready.
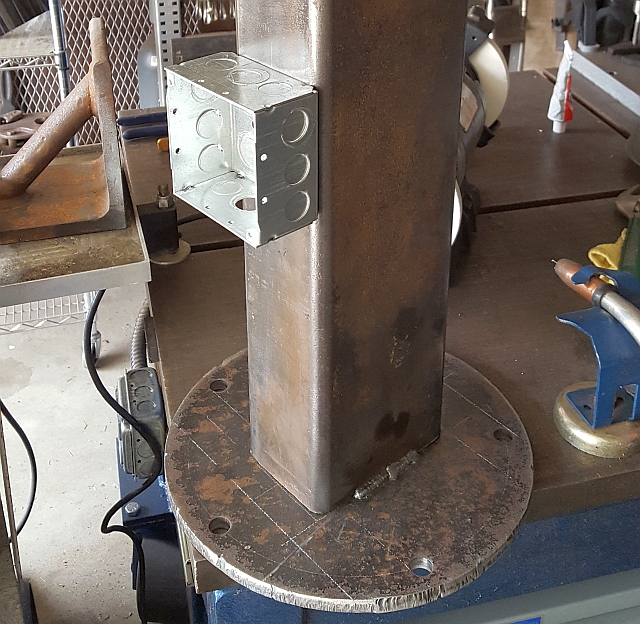
I had a piece of heavy rectangular 4x6" tube in my pile of drops. I think it has a 3/8" wall, stout stuff indeed. If it had been made of sixteen gauge it would have been plenty strong, so it was way more steel than I needed but I do like to use up the scraps I have in my shop, so that's what I did. I just used the whole length for my vertical column. I have mentioned before in a different build blog that I like to add 4-gang electrical outlet boxes to my projects. It makes it much less likely that I will need an extension cord, and plus I already had the electrical parts in my junk box. I drilled and tapped the column with two 10-32 holes to screw on the junction box. The next picture shows the punched base with the column welded on (note, I didn't weld it up solid. Three inches of weld on the sides equals six inches of weld, which is plenty strong enough to withstand the forces put on it in even the worst case scenario) and with the electrical box attached.
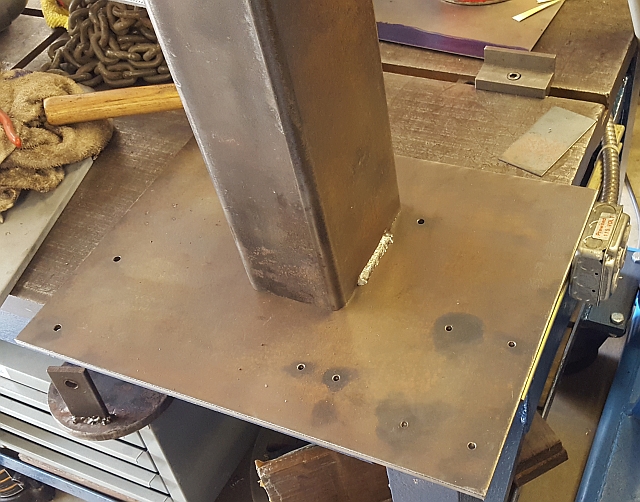
I made the top plate from another piece of steel plate left over from a previous project. I cut a piece of 1/4" plate to size with a plasma cutter, taking some pains to get it as square as I could. Then I burned quite a few calories designing the layout of the top plate. The end result was the layout of several holes. So I did the hole layout and used a mag drill to drill the holes for tapping. After that I put the plate upside down on my welding table and put the column upside down in place on it, and welded it on. Here's a pic:
That completed the fabrication part of this sharpening stand project. Now let me go back and fill in the details as to the items that go on top of the stand, starting with the bench grinder. This bench grinder has a story, like most old machines. I bought it used, from a guy whose dad owned a gas station for years. This was the bench grinder in their service bay. It is branded "Dayton Commercial". Now, Dayton is Grainger's house brand. But back then they were a Chicago-based company that made good quality bench grinders. I knew this when I went to buy the grinder. It was missing one of the cast iron wheel guard covers, which is a serious drawback. Normally I would never buy an incomplete bench grinder, but in this case I made an exception because it ran so smoothly when I tested it. After I got it home I really scratched my head as to how to do a decent job making a new wheel cover. I never for one minute considered setting the grinder up in my shop with an incomplete wheel guard. Safety first, you know!
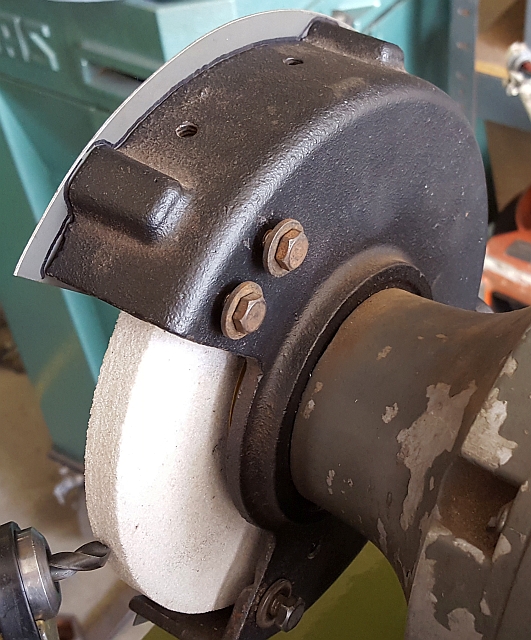
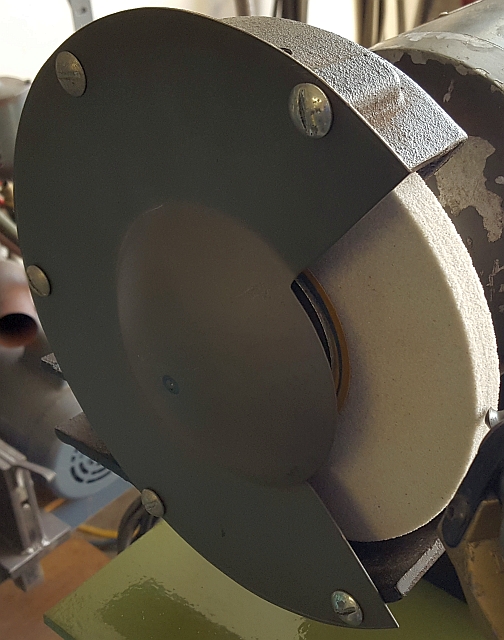
It's easy to cut out a circle and match the bolt pattern and cut away the part of the circle you don't want to form a new wheel guard cover. What is much harder is forming the bump in the center of the cover where the spindle and nut go. I thought about how to form a clean spherical bump for awhile without luck. Eventually I hit upon the idea of buying the equivalent part off of a more modern, larger grinder, and cutting off around the edge what I didn't need. I went to a local Harbor Freight store and looked at their current stock of grinders. I found an 8" bench grinder that had a left hand cover plate that looked like it could be made to work. I came home and downloaded the manual for that SKU and called up Harbor Freight's parts number and ordered the cover. They had to order it from China, and it took a long time to come in. But when it got here, I was gratified to see that it could be made to work. I eyeballed the center of the bump and used that point to draw the correctly sized circle to fit my grinder. All of the bolt holes for the 8" grinder's wheel guard were outside of that line. Then I used a shear to make a bunch of straight cuts going around the circle just outside of the line, then used a disc sander to sand it to the line. Then I used transfer screws to lay out the holes, and punched the holes. The opening doesn't quite match and the sheet metal is a lot thinner than the cast iron cover on the other side. But the bottom line is now the grinding wheel is buttoned up and doesn't look too bad, and that's really what mattered to me. Here are a couple shots of the new cover plate, inside and out:
Now let me talk for a minute about the sharpening tooling I used. I found a used Darex M3 in good condition, and I found a used tool bit grinding jig called a Grind-R-Table. I had previously owned both setups before, and was able to do excellent work on them. I sold them a long time ago during a period when I wasn't doing much shop work. I later came to regret selling them. You may remember ads in the older "Home Shop Machinist" magazines selling these grinder accessories. The company was named Glendo, the same people who make the Accu-Finish. Glendo still sells the table today. Needless to say they are a whole lot more expensive today than they were when I bought mine back in the 1980s! Anyway, although Glendo still makes the table, Darex does not still make the M series drill grinders. After they stopped selling the M series machines, they moved to selling the Drill Doctor, which was not a success for them. They quickly distanced themselves from that product and proceeded to develop a much more expensive series of drill grinders, which they still sell today. As I mentioned, I'd owned an M series sharpener before and liked it. In addition, my buddy has an M5 which I borrow from time to time so I'm still very familiar with the M series sharpener. It's very discouraging to go look for one today, though, as they now sell used for ridiculous prices. I got very lucky recently, though, when an old friend in my metalworking club sold off a lot of stuff he wasn't using and I was able to pick up the basic M3 for a good price. It only had the 1/8-1/2" chuck, though, and it was frozen. Chucks that freeze are the bugaboo of the Darex M series. Lots of their chucks have had to be thrown away. A small amount of corrosion inside can make them impossible to operate. My luck held, though, because with a little force my new chuck started to work. I followed the instructions in the manual to disassemble and clean out and lubricate the chuck, and now it works OK again. I really wished the M3 had come with the 1/2-3/4" chuck, though. I remember using mine quite a bit. Well, as it happened, my lucky streak wasn't over yet. I called up the Darex parts gal and she told me they no longer supported the M series machines but that they had just a couple of parts left in their warehouse. Lo and behold they still had a 1/2-3/4" chuck brand new! I bought it for about half what a beat up used one goes for on ebay, and laughed all the way to the bank.
So what is the difference between a Darex M3, M4 and M5? A Darex M5 is an entire machine on a pedestal with a work light. It includes a grinder, a drill sharpening setup on one side and a point splitter on the other. A Darex M4 is the same thing minus the point splitter. An M3, on the other hand, is just the drill sharpening parts. You have to mount them on your own table and fit them exactly to your grinder. And Darex no longer had the instructions to do this. Fortunately, a guy sent me a scan of the original M3 installation instructions. I was also able to download the Grind-R-Table installation instructions from accu-finish.com, Glendo's Web site. It was the data from those documents that I needed to complete the design of my grinder table. It turned out I needed to make a block to raise the grinder to the right height for the Grind-R-Table, and I had to make another block to raise the M3 to meet the new grinder spindle height. I made one part from a steel block I had in my bin, using my Sheldon shaper. My buddy cut me a piece of MDF and planed it to the right thickness for me. With all of the holes drilled and tapped, and the lower plate ready to bolt to the brake drum, it was time to put this project together.
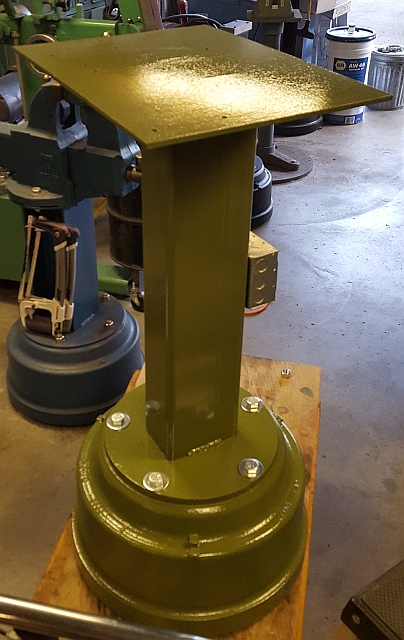
I decided to use a quart can of Zynolite epoxy paint I bought about 1987 and used on one project and have had in my paint locker ever since. The color is "Fern Green" and I really like it. I used a disposable 4" roller and a disposable pan bought at Home Depot. I got a local Benjamin Moore store to shake the paint can up thoroughly. They were nice guys and didn't charge me a dime. Rolling on the paint went quickly. I sprayed the inside of the drum with gray primer first, before rolling on the epoxy paint. I gave it a couple of days to cure. Here's an image of what the table looked like after painting:
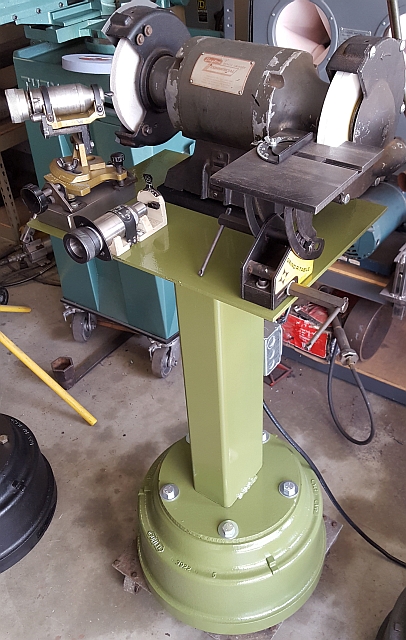
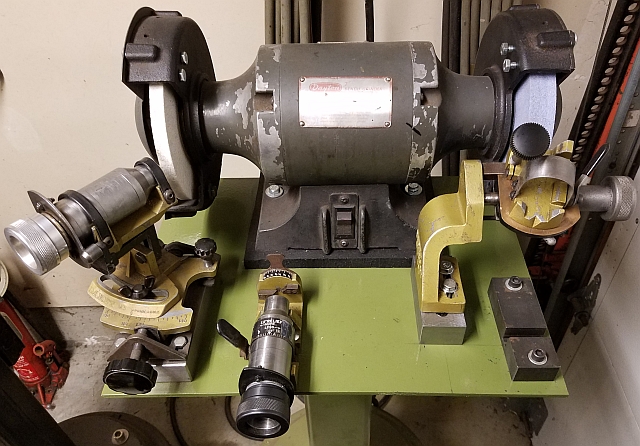
Even though it still wasn't fully hard, I put the whole sharpener table together. Here are all of the various components bolted to the top of the table:
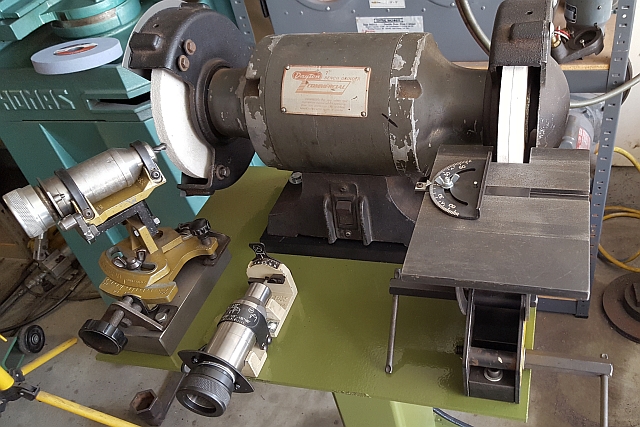
And, once again, here is what the whole sharpening table looks like:
If you look closely in the picture above, you can see the power cord coming from the bottom of the electrical box on the column. Since this machine will be out away from my shop walls, where the other outlets are, you can see how having all the outlets available will be useful in my shop. Here is a shot of the outlet box on the completed machine:
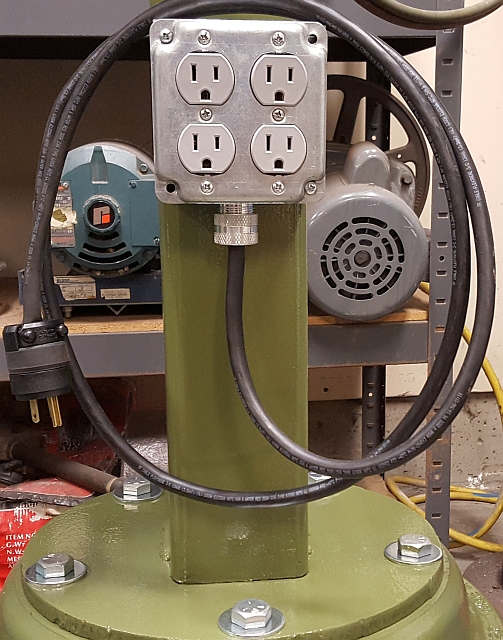
Just a quick note on the electrical installation: I used 12-3 SOOW for the power cord. I chose it for its flexibility and also it's thinner than SO3 cord. Also note the strain relief fitting. It is a Hubbell SHC-1023. These cost a few dollars but they are a lot more satisfying to use than cheaper strain relief fittings.
I designed the grinder spindle to be at 45-1/2" from the floor. This may sound tall, but it works well for me as I've learned from other projects.
I eliminated some vibration from the bench grinder. Here is that article.
Update: I found a bunch of usable parts from a Darex M5 being scrapped. From this I took the point splitter attachment. I made up a little mount block and added it to my sharpening table. You can see it mounted in front of the blue wheel:
Now I can remove the grinding table and install the point splitter when I want to grind split point drills. It can also be used for web thinning. With the addition of the point splitter, my little sharpening table can now do everything the Darex M5 can do, plus more. I'm pleased with the point splitter but I'm still not really happy with the grinds I'm getting. I can't seem to dress the wheel to have a sharp enough corner. I may decide to try a CBN plated wheel later - that should have a nice sharp corner that won't rapidly break down.
I know that lots of Darex M series sharpeners' chuck holding straps have broken. I decided to investigate what it takes to make new straps. I chose to buy a large 50 lb. test wire tie for the material. It is close to the same width as the original straps. I found that all I had to do was punch a 3/16" hole, screw on the strap, bend the strap over the chuck and mark the other hole location, punch the second hole and trim the ends to fit. If your Darex straps are broken I urge you to give this method a try. I found the straps I made fit well enough so that I didn't even have to cut an adjustment slot - I just used the two holes.
(2024 update) Eventually the straps I made from the heavy wire tie broke. I noticed that a guy is 3D printing the Darex straps and sells them on ebay. At the time of this writing several vendors are selling the pair of straps for $13.
I added a machine light to this sharpening table. The picture isn't the greatest, but you get the idea:
Thanks for reading!